In today’s digital world, keeping your PC fast, clean, and secure is more important than ever. If your computer feels slow, takes forever to start, or is cluttered with junk files, you’re not alone. Thankfully, tools like SystemCarePro can bring your PC back to life with just a few clicks. In this blog, we’ll walk you through a complete installation guide for SystemCarePro, step by step—no technical knowledge required.
Whether you’re a student, a business professional, or a casual user, this guide is designed to help you install SystemCarePro easily and begin optimizing your system right away.
What is SystemCarePro?
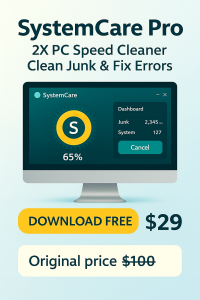
SystemCarePro is a user-friendly PC optimization and security software developed by DigitalBulls. It’s designed to clean junk files, speed up performance, manage startup apps, update outdated drivers, and protect against malware and privacy threats—all from a simple, easy-to-navigate dashboard.
It’s ideal for both new and experienced users looking to keep their computers in top shape.
System Requirements
Before you start installing SystemCarePro, make sure your computer meets the following basic system requirements:
If your PC meets these requirements, you’re good to go.
Step 1: Download SystemCarePro
Step 2: Run the Installer
You’ll be guided through a series of steps:
Click Install to begin the installation process. It usually takes less than 1 minute.
Once the installation is complete, click Finish. SystemCarePro will launch automatically.
Step 3: First Launch and Setup
When SystemCarePro opens for the first time, you’ll see a clean dashboard that gives you a quick overview of your PC’s health. You might see alerts like “Too many startup programs,” “Junk files found,” or “Outdated drivers detected.”
Click the “Scan Now” button in the center of the dashboard to perform your first full system check. This includes:
The scan may take 1-3 minutes, depending on your system.
Step 4: Fix Issues Automatically
After the scan, SystemCarePro will list all the issues it found. You can review them or just click “Fix All” to let the program clean and optimize everything at once.
In most cases, this step will free up disk space, reduce boot time, and improve overall speed.
Step 5: Enable Real-Time Protection (Pro Version Only)
If you’ve upgraded to SystemCarePro Pro, you’ll have access to real-time protection features. Here’s how to enable them:
If you’re using the free version, you’ll see an option to Upgrade Now.
Step 6: Activate Your License (Optional)
If you’ve purchased the Pro version, follow these steps to activate it:
Your Pro features will unlock immediately, giving you access to full optimization, deep cleaning, and customer support.
Step 7: Set Up Automatic Maintenance
One of SystemCarePro’s most useful features is automatic maintenance. To set this up:
This ensures your computer stays optimized without you lifting a finger.
Common Questions
Q: Is SystemCarePro safe to install?
Yes. It’s a trusted program developed by DigitalBulls with no hidden software or ads.
Q: Will it delete my personal files?
No. SystemCarePro only removes junk files, temporary data, and system clutter. Your documents, photos, and downloads are untouched.
Q: Do I need an antivirus too?
If you’re using the Pro version with real-time protection, you may not need a separate antivirus. However, having one additional light antivirus as a second layer is okay for added safety.
Tips for Best Results
Final Thoughts
Installing SystemCarePro is one of the easiest and smartest ways to improve your PC’s performance and protect it from digital threats. The process takes only a few minutes, but the benefits last much longer. Whether you’re trying to make an old PC run like new or want to keep a new one running smoothly, SystemCarePro delivers simple, effective results.